IntelliJ
Contents
Introduction
This page contains some useful guides on how to perform certain operations in IntelliJ, such as creating modules and exporting data to a JAR file. Further information can be found on the IntelliJ IDEA 14 help page.
(Back to top)Modules
For the purposes of this class, think of modules as sub-projects. They provide a nice way for use to separate assignments. For example, for the mini-projects, you should have one IntelliJ project called something like csc261-mini-projects. Then each of the mini-project should be a module in that project.
To create a module in IntelliJ, make sure the project you want to create the module in is open. Then:
- go to "File" → "New Module"
- in the window that pops up, make sure that "Java" is selected on the left side
- click "Next"
- give the module a name (e.g., MP1 for mini-project 1)
- click "Finish"
The module you just created will appear in the "Package" tree on the left tool window in the IntelliJ editor (make sure you are in Package view and not Project view). Make sure that you select the module in one of those windows before create a new class—this will ensure that your class will be put into that module and not the project at large.
(Back to top)Creating a JAR
IntelliJ is great for editing projects, but you need to be able to get that code out of IntelliJ so I can see it and grade it. We're going to do that using JAR (Java ARchive) files. For each module (for the mini-projects) or project (for the final project), do the following:
- go to "File" → "Project Structure"
- on the left side of the window that pops up, click "Artifacts"
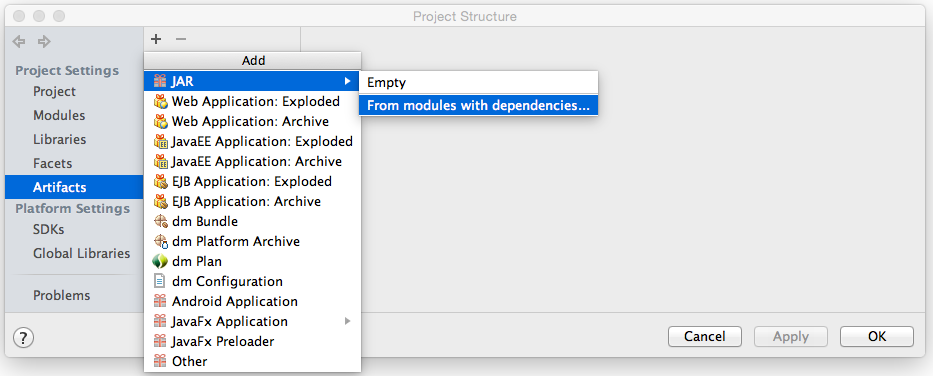
- click the "+" above the white pane, as shown below

- hover over "JAR" and from the side menu that appears, select
"From modules with dependencies..."
- select the module you'd like to JAR from the "Module" dropdown menu
- check the box next to "Include tests" at the bottom
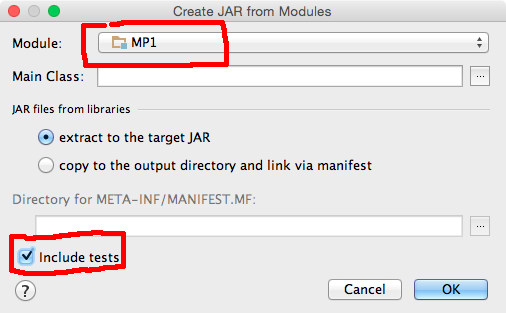
- click the "OK" button (this brings you back to the "Project Structure" window)
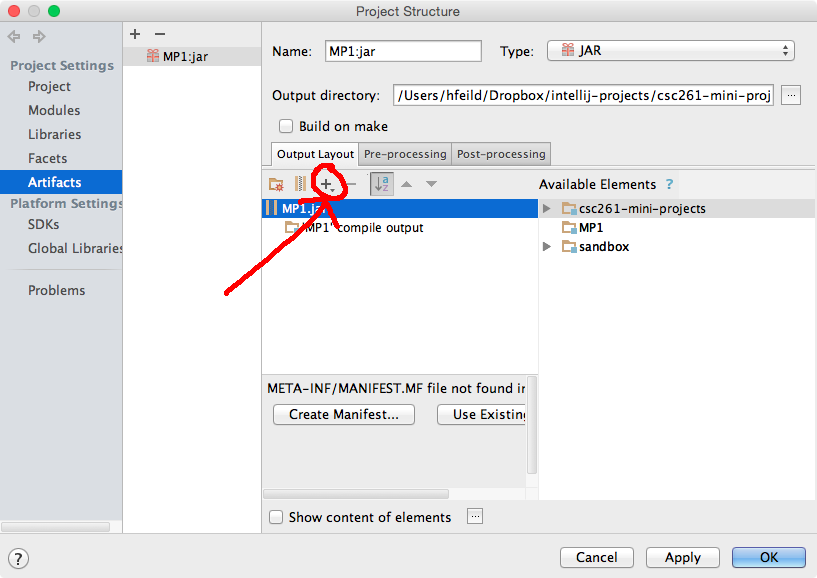
- click the "+" button
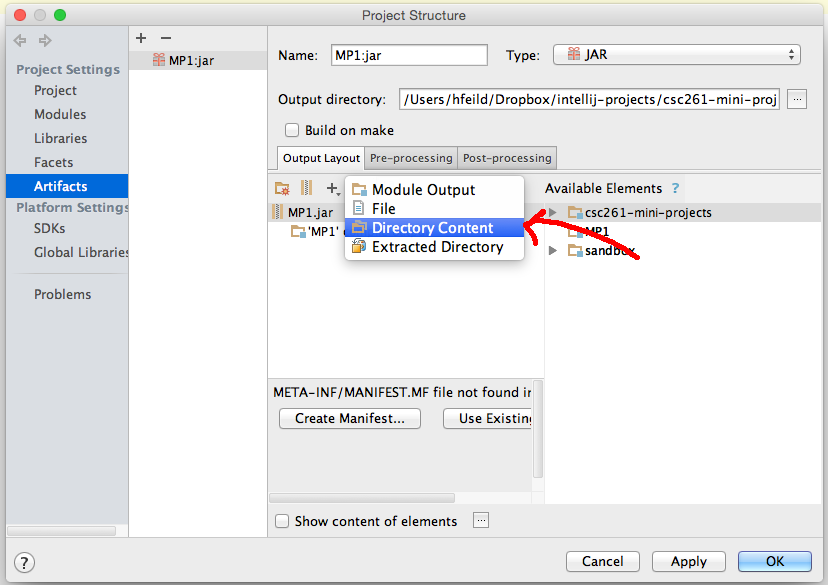
- in the menu that pops up, select "Directory Content"
- that brings up a directory listing; select the folder for your
module and click "OK"
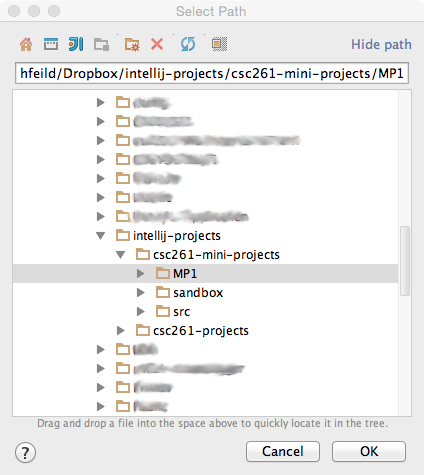
- click "OK" to save the artifact settings
- to build your artifacts:
- in the main editor, go to "Build" → "Build Artifacts"
- a small window pops up; select "Build"
- to locate your artifacts:
- navigate to your project's folder on your harddrive (you can shortcut this by right-clicking on your project in the left tool window and selecting "Reveal in Finder", or similar based on your OS)
- open your project's folder, and there should be a folder called "out", with another folder inside it called "artifacts"
- inside of "artifacts", you should see one folder per artifact, named something like: "MP1_jar"
- inside of that folder you will find the actual JAR, which will be named something like "MP1.jar"—this is the file you need to upload for that assignment