Installing a C++ Compiler
Contents
Compiler
This document will help you install and configure a C++ compiler. Choose your
platform and install. You can test by opening Terminal (Mac) / cmd.exe
(Windows) and entering g++. If you get a warning that no files were
provided, then you're all set! Otherwise, if you get an error about the command
not being found, then the C++ compiler is not installed properly.
Mac
OSX 10.9 and later
Open the Terminal application: hit Command+Space and type "terminal";
select "Terminal" from the drop down. In the terminal window that pops up, type
g++. If you do not have the necessary compiler files installed, you
will be prompted to install Mac's Command Line Tools. Install those and you
should be all set.
OSX 10.8 Mountain Lion or earlier
First, make sure that your security settings allow for software to be installed from anywhere. To do this, go open your System Preferences (go to the apple in the upper left and select "System Preferences"). Then select "Security & Privacy". If the lock icon is closed in the bottom left of the window, click it to unlock your settings. Then click the option to allow apps downloaded from "Anywhere". After you follow the next steps, feel free to go back and change your settings back to what they were.
This project is for you as it will get you only the parts of XCode that you need for this. Download and install the package that matches your version of OSX (10.6 == "Snow Leopard", 10.7 == "Lion", 10.8 == "Mountain Lion").
Now open a terminal: press Command+Space top open Spotlight and type
"terminal"; select "Terminal" from the drop down. In the terminal window that
pops up, type g++. If the compiler installed correctly, you should
see an error that looks something like:
g++: error: no input files
If you see something like this, you're all set.
(Back to top)Windows
a. Download and install MinGW
Download MinGW and install it. The first window in the installation process should look like this:
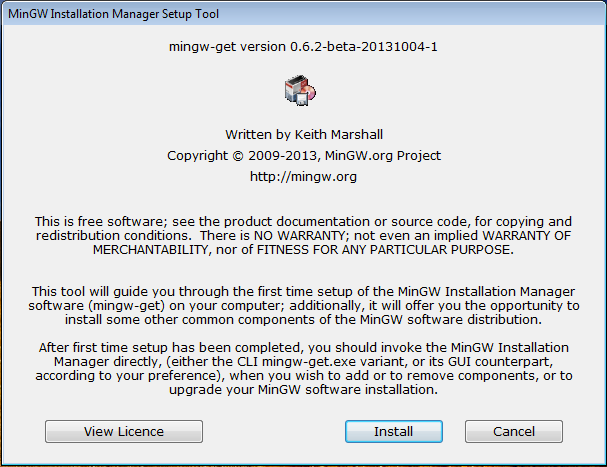
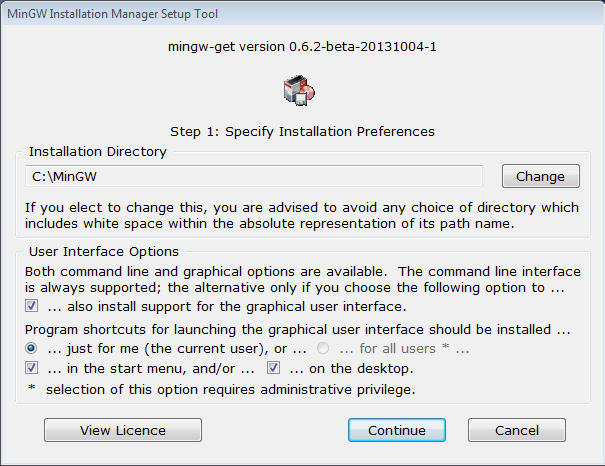
Select "Install". The next screen will ask you for some options. Just stick with the defaults and click "Continue".
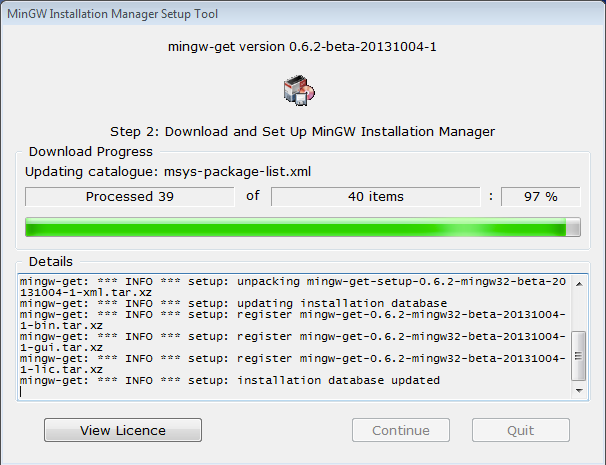
That will cause MinGW to be downloaded. You should see a window like below; once it's finished, select "Continue".
b. Install libraries
In the MinGW Installation Manager, we need to mark a set of packages to install.
Start by right clicking on the "mingw32-base" package and select "Mark for Installation", as shown in the screen shot below. That will make the little box to the left turn green with a little arrow on it.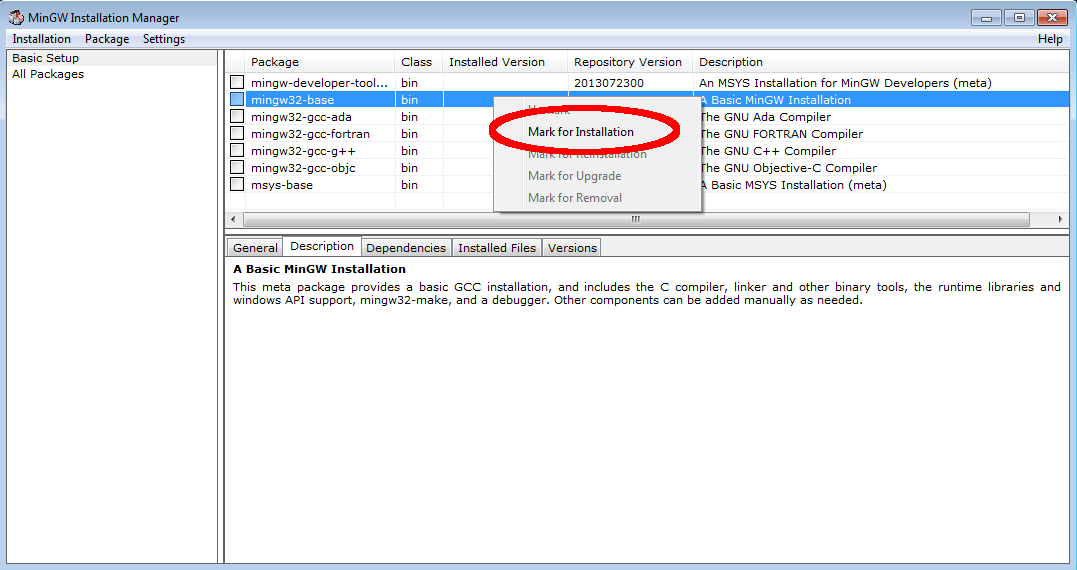
There's a few more packages you need to mark—be sure that you right-click on the following four packages and select "Mark for Installation". This will cause many additional packages to be marked automatically (don't worry, that's suppose to happen):
- Under "Basic Setup":
- mingw-developer-toolkit
- mingw32-base
- mingw32-gcc-g++
- msys-base
- Under "All Packages" (to get to this, click on "All Packages" in the
far-left pane, then scroll down in the pane on the right until you see the
package name):
- mingw32-libpdcurses (mark the dev package, and the dll package will automatically be marked)
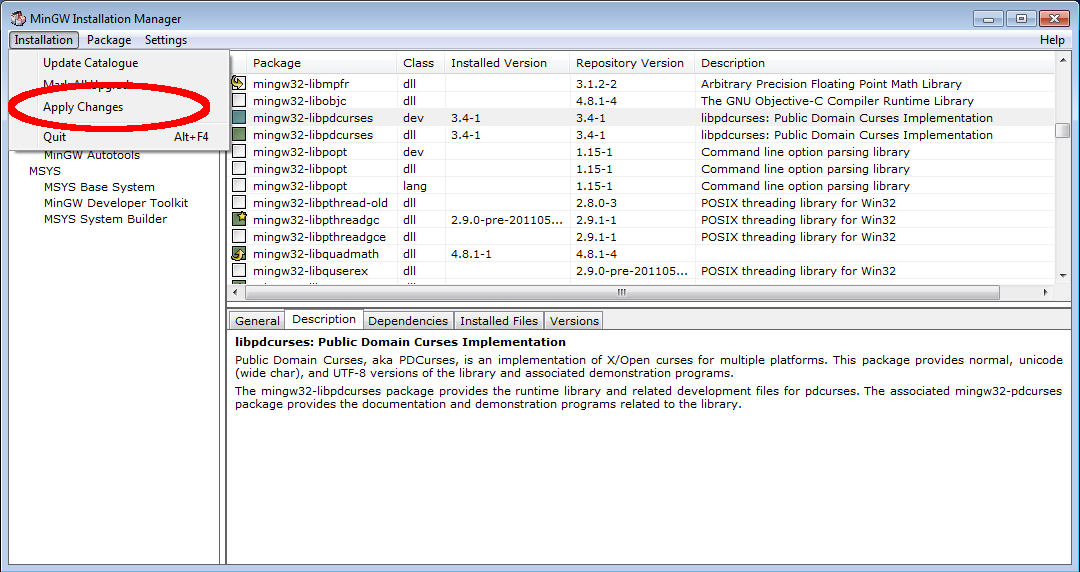
Once you've marked all these, you'll need to apply the changes. Do this by clicking the "Installation" menu and selecting "Apply Changes", like this:
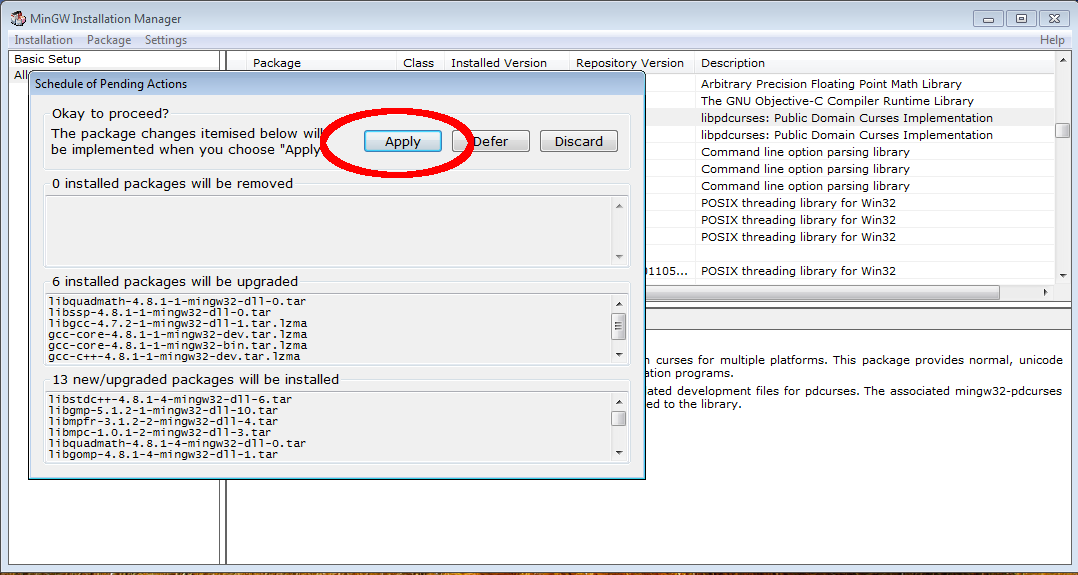
That will cause a confirmation window to appear; click "Apply":
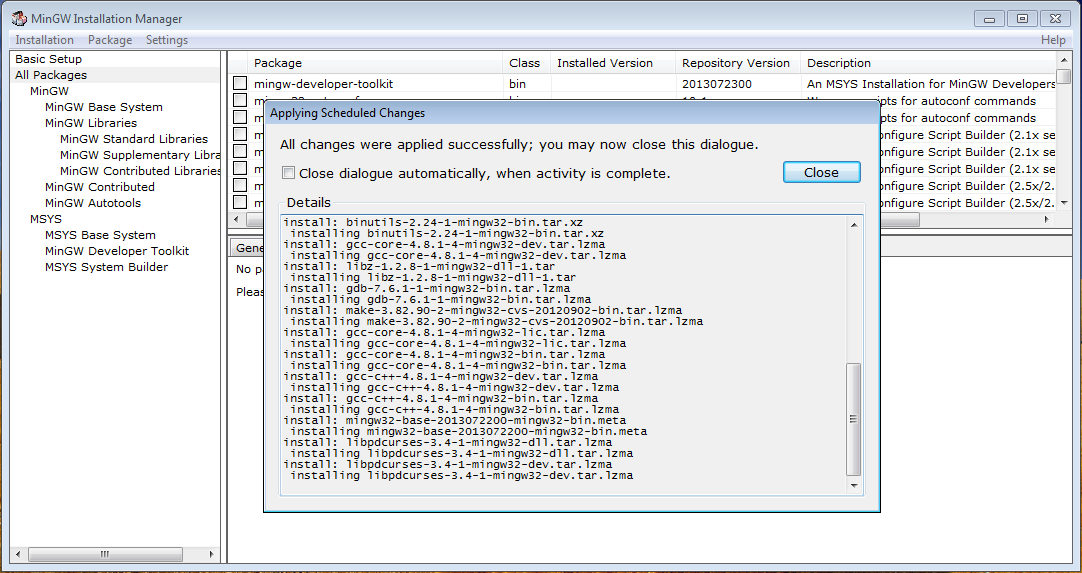
That downloads and installs all the packages marked for installation. Once it's finished, the installation window will stay open; just click "Close":
And finally, you can close out of the MinGW Installation Manager. The next think you'll have to do is set your path (see the section below).
c. Set environment variables
In order to use the compiler, you need to update your computer's Path environment variable to include the location of MinGW ad MSYS as follows:
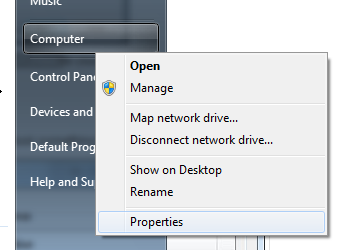
- Get to your computer properties:
- Windows 7: Right click on "My Computer" and select
properties:
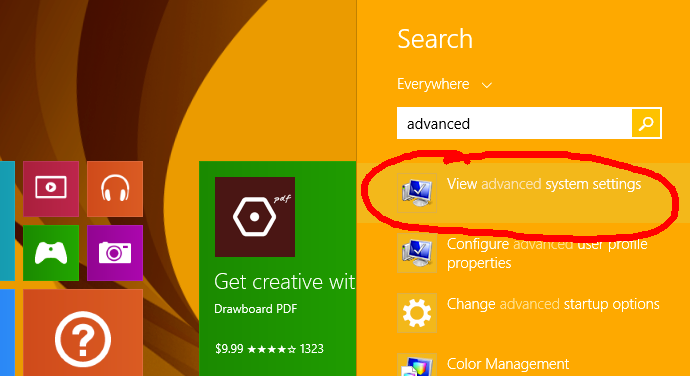
- Windows 8: Go to start (hit windows key) and start typing
"advanced"; this should issue a system search and one of the results
should be "View advanced system settings"—click that:
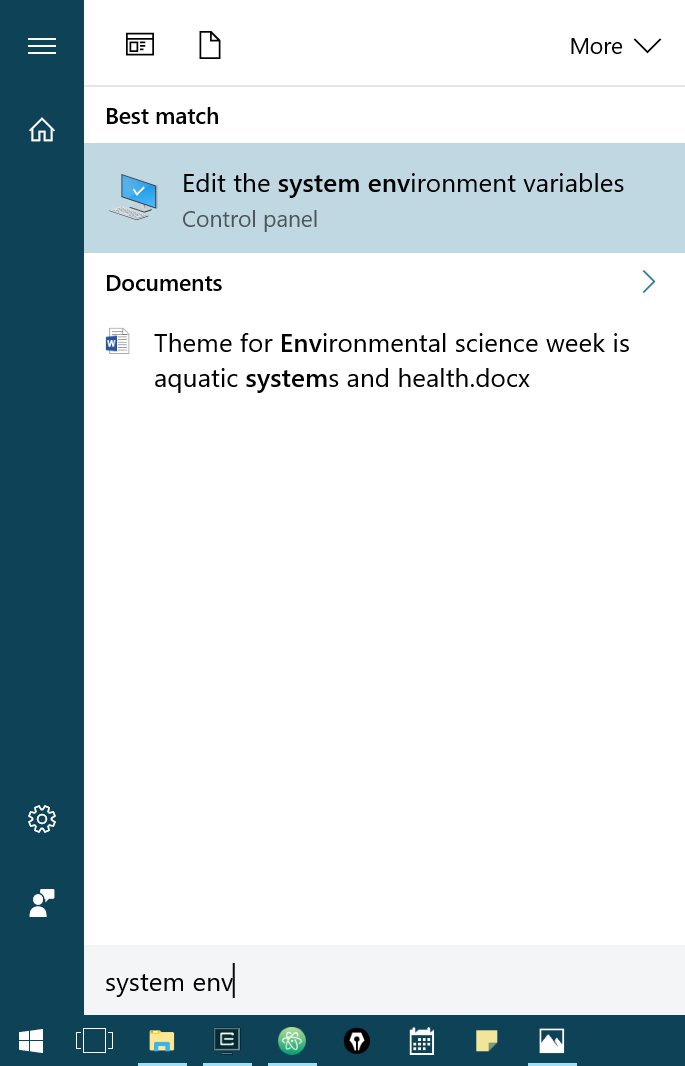
- Windows 10: Hit the windows key and type "system environment";
this will bring up the search result "Edit the system environment
variables"—click that
- Windows 7: Right click on "My Computer" and select
properties:
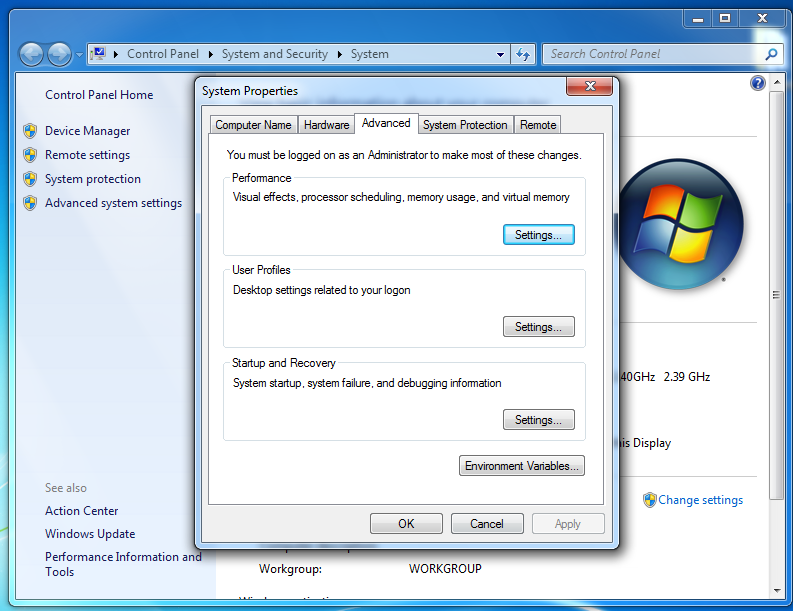
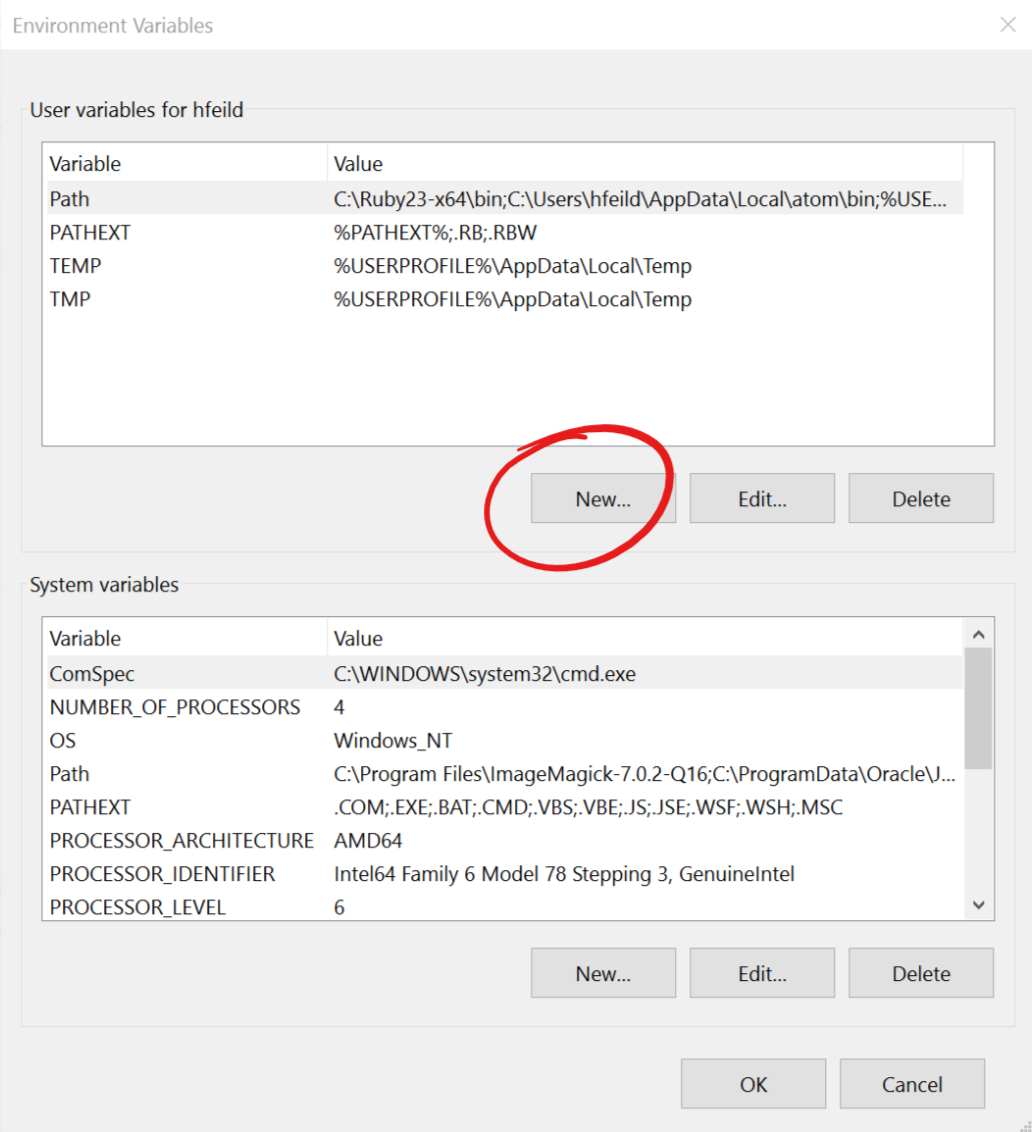
- Click on "Advanced Settings" and from the "Advanced" tab click the
Environment Variablesbutton:
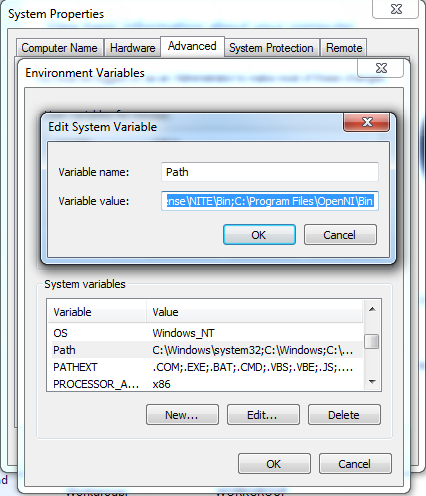
- In that popup window you want to edit the Path system variable
by first finding it under the "System variables" section (1 in the following
image) and then selecting "Edit" underneath (2 in the following image).

- In Windows 7 and 8, you should add the following at the
beginning of the value already present:
C:\MinGW\bin;C:\MinGW\msys\1.0\bin;(make sure to include the trailing semicolon). Do not remove the text that is already there, as that may cause other applications to fail.
- In Windows 10, click "Edit" (1 in the following image) then type
in the first path:
C:\MinGW\bin(2 in the following image). Repeat that for the second path:C:\MinGW\msys\1.0\bin;; press "OK" when both variables have been entered.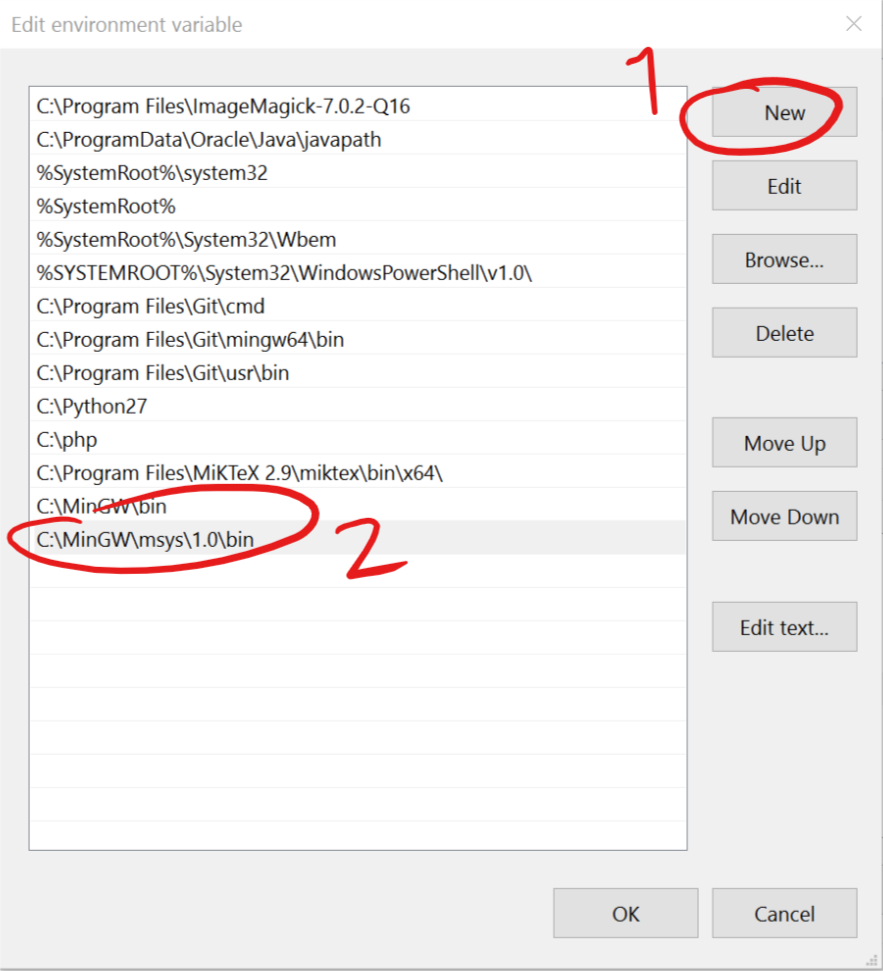
- In Windows 7 and 8, you should add the following at the
beginning of the value already present:
- Next, we need to create a variable called HOME; under "Users
variables for <your user name>", click the "New..." button
- In the "Variable name" text field, enter "HOME", and in the "Variable
value" text file, enter "%USERPROFILE%":
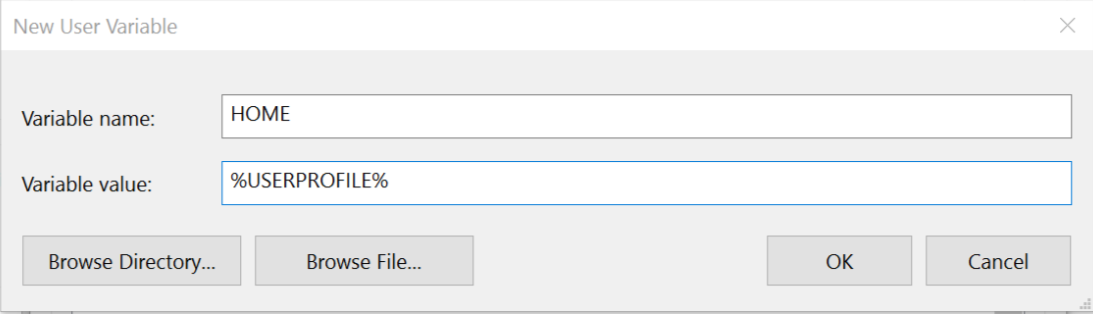
- Click "OK"
- You're all done setting variables, so click "OK" to exit the editor
Now open a the system command prompt by pressing Win + r (Windows key and 'r' key) and type "cmd" in the box that pops up. Click "OK". Here's what it should look like:
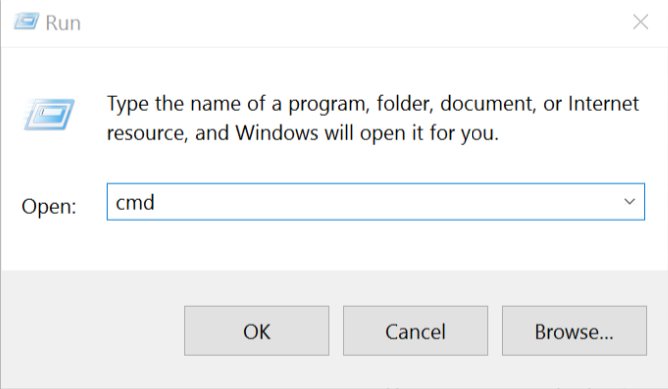
A black windows should
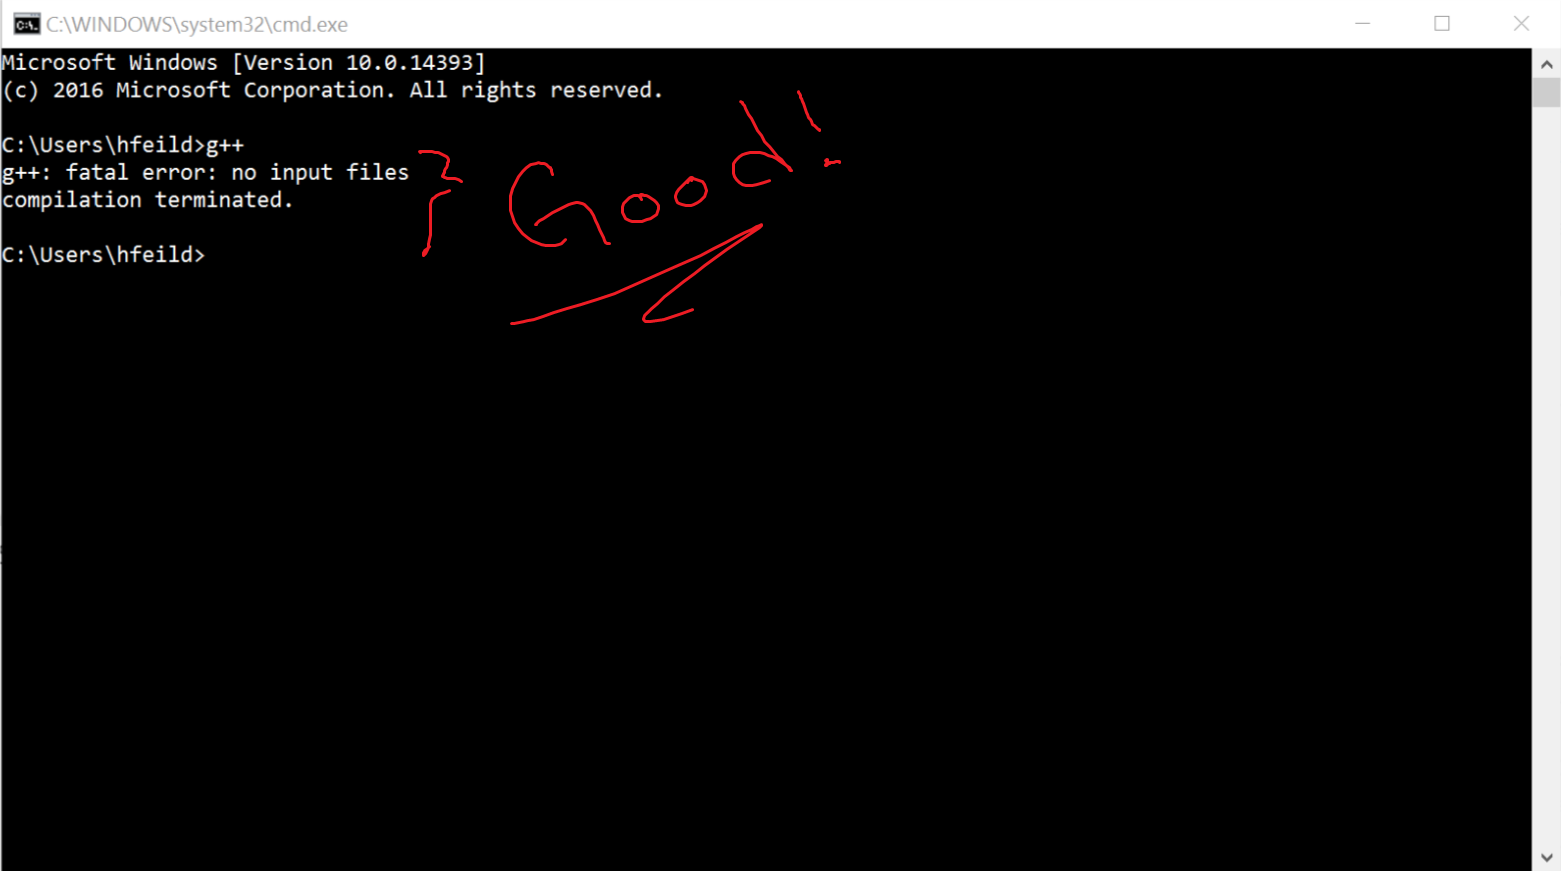
pop up with a command prompt. Type g++;
if you get a warning that no files were supplied, you're all set. Here's what
success looks like:
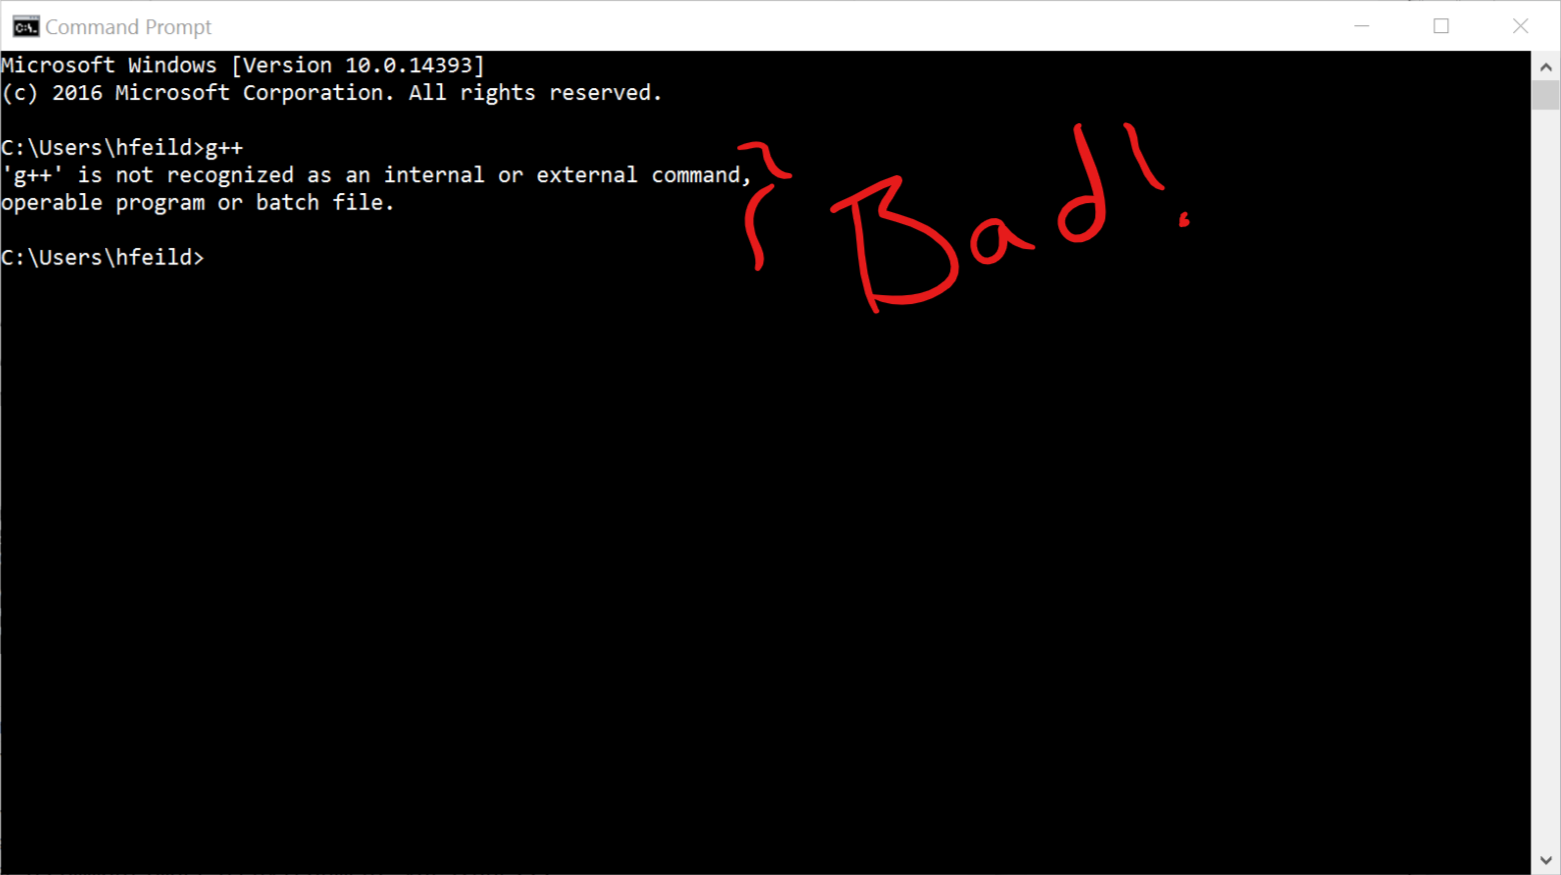
If you get an error that the command g++ was not found, then something went wrong—most likely, the Path variable was not set properly. Here's what that looks like:
 (Back to top)
Linux
For Debian-based distros (e.g., Ubuntu, Mint, etc.), see the instructions below. For other distros, see me or the community forums for that distro.
sudo apt-get update
sudo apt-get upgrade
sudo apt-get install build-essential libncurses5 libncurses5-dev